Selling a greeting card is personal. Receiving one with a bent corner, a scuffed front, or a folded envelope takes away from that moment—and can create a preventable return for your shop. The good news is that greeting card packaging does not need to be complicated. The key is to keep the card clean, supported, and still inside a package sized for the order.
This guide explains how to ship greeting cards for online orders, whether you are sending one A2 card, a small bundle, or a wholesale pack.
Choose the packaging by order type
The right packaging depends on the card’s thickness, the number of cards in the order, and how much bend protection the shipment needs. A plain paper envelope may suit a simple personal mailing, but ecommerce orders often benefit from more structure and a more polished unboxing experience.
| Order type | Recommended packaging | Why it works |
|---|---|---|
| One standard card and envelope | Stayflats® Photo Mailer | Rigid support helps resist bending and keeps the presentation neat. |
| A card with a small add-on, such as a pin or sticker pack | Poly Bubble Mailer | Adds light cushioning and helps protect against scuffs and moisture. |
| Several cards or a retail-ready set | Corrugated Mailer Box | Gives a growing stack more structure and space without crushing it. |
| Larger cards, boxed sets, or wholesale quantities | Brown Corrugated Box | Provides room for protective layers and helps prevent shifting. |
Measure the card after it is paired with its envelope, sleeve, or backing board. Choose the smallest mailer that lets it slide in comfortably. A package that is too large allows movement; one that is too tight can press on corners and edges.
Supplies for shipping greeting cards
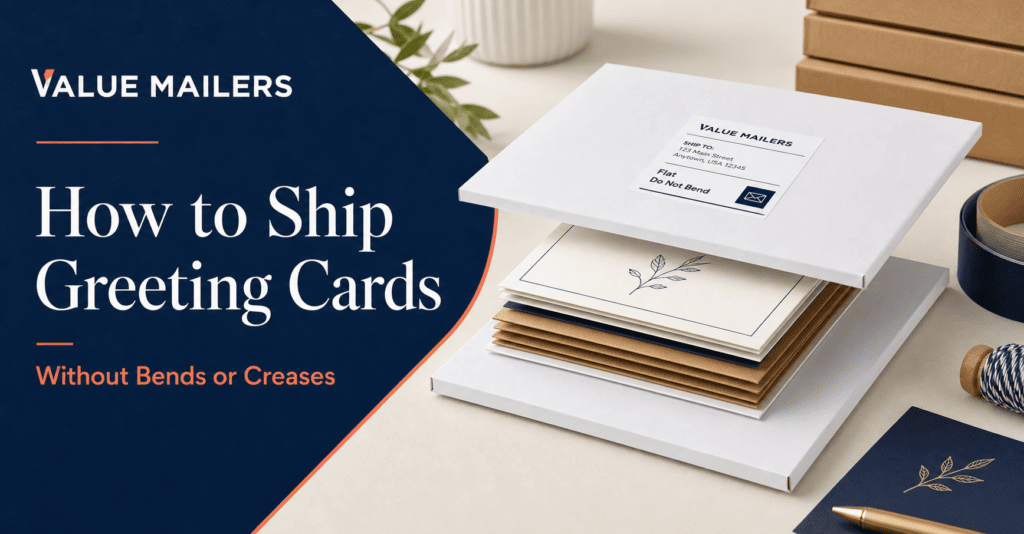
For most single-card orders, gather a protective clear sleeve or bag when it fits your presentation, two clean flat backing sheets or a rigid mailer, a correctly sized mailer or box, and a printed shipping label. For card bundles, add a paper band, belly band, or inner sleeve to keep the set aligned. Use tissue only when it adds protection or improves the opening experience; excess material can let the contents move around.
How to package greeting cards for shipping: 6 steps
1. Inspect the card before packing
Start with a clean, flat card and matching envelope. Check the corners, fold, and printed surface under good light. This small quality-control step is especially worthwhile for foil, letterpress, hand-painted, or limited-edition cards.
2. Keep the card and envelope together
Place the envelope behind the card, facing the same direction, so both pieces stay flat. If you use a protective sleeve, remove excess air before sealing it. For a multipack, square the edges before adding a band or inner wrap.
3. Add rigid support without creating pressure points
For a single card, place the sleeved card between two flat, clean backing sheets that extend slightly beyond every edge. The sheets should support the card, not squeeze it. Avoid staples, paper clips, or adhesive directly on artwork. If your mailer already provides enough rigidity, extra backing may be unnecessary. Test one packed sample first: hold it at the sides and make sure the card cannot slide, curl, or meet the outer edge.
4. Use a mailer that matches the level of protection
Stay Flat Mailers are a strong everyday choice for cards, invitations, stationery, and similar paper goods that need bend resistance. Use a bubble mailer when the order includes a small, delicate add-on or needs lightweight cushioning. Bubble cushioning helps with minor impacts, but it does not replace rigid support for paper goods that must arrive flat. For a boxed card collection or a bigger wholesale stack, move up to a corrugated mailer box with a snug fit.
5. Prevent movement inside the package
Before sealing, gently move the package side to side. If the contents slide, add an appropriately sized backing sheet, a small amount of packing tissue, or choose a better-fitting mailer. The goal is a secure hold, not a tightly compressed card.
For large-format stationery or flat retail products, one-piece record mailers can also be a useful option. Their adjustable-depth design is made for record albums and can suit other flat products when the dimensions and protection needs match.
6. Apply the label on a smooth, readable surface
Seal the package according to the mailer’s closure instructions. Apply the shipping label flat on the largest clear panel, without wrapping it around an edge or seam. Confirm that the delivery address, return address, barcode, and any required carrier details are readable before the order leaves your packing area.
A simple packaging workflow for card sellers
Consistency matters when you pack dozens of orders at a time. Create one approved packing recipe for each common order type—single card, two-to-four-card bundle, and wholesale pack. Keep the matching mailer size, backing sheets, labels, and closure material together at your station.
Then periodically pack a sample, inspect the corners after it has been handled, and adjust the recipe if you see movement or wasted space. This turns greeting card shipping from a last-minute task into a dependable part of your ecommerce packaging process.
Common greeting card shipping mistakes
Mailing an unprotected card in an oversized envelope
A loose card can slide, flex, and pick up corner damage. Use a snug mailer and enough support for the product.
Relying on bubble cushioning alone
Padding helps absorb impact, but cards can still bend if the outer package flexes. Pair cushioning with a rigid layer whenever flatness is important.
Using tape directly on the card or artwork
Adhesive can lift ink, tear paper, or leave residue. Secure the outer package or the protective backing instead.
Treating every order the same
One card and a 20-card wholesale pack have different needs. Match the mailer, structure, and void control to the order rather than forcing every shipment into one format.
Greeting card shipping checklist
- Card and envelope are clean, flat, and aligned
- Artwork is protected from rubbing and adhesive
- Rigid support extends beyond the card edges when needed
- Mailer or box fits without excessive empty space
- Contents do not slide when the sealed package is gently moved
- Shipping label is flat, scannable, and complete
Frequently asked questions
What is the best way to ship a single greeting card?
For an ecommerce order, a rigid Stay Flat Mailer is a practical choice because it gives the card bend resistance and a professional presentation. Add a protective sleeve or backing sheets when the card finish or order value calls for extra protection.
Can I use a bubble mailer for greeting cards?
Yes, particularly when a card order includes a small add-on or needs light cushioning. For cards that must stay flat, include a rigid layer or choose a rigid mailer rather than relying on the bubble lining alone.
How do I ship multiple greeting cards together?
Keep the stack square with an inner sleeve or band, then choose a mailer or corrugated box with enough room for the bundle and support. The stack should not be able to shift during transit.
Do greeting cards need a box?
Not always. A single card or slim bundle can often ship well in a rigid mailer. Use a corrugated shipping box for thicker sets, higher-value orders, or shipments that need more protection than a mailer provides.
Ship cards with the protection their presentation deserves
The best greeting card packaging balances three things: a snug fit, enough rigid support, and a clean final label. Start with a packaging recipe that fits your most common order, then scale up to a corrugated box when a bundle needs more structure. Explore ValueMailers’ packaging supplies to build a workflow that keeps every card ready to give when it arrives.